This section aims to guide you through the basics so you can learn to ride. It includes the preparation required before you even start to learn. The video clips in this section are from the Unicycle Skills DVD, a 43 minute introduction to unicycling.
- Selecting a unicycle
- The learning space
- Setting up your unicycle
- Mounting your unicycle
- Balance
- First Steps
- Launching
- Learning to idle
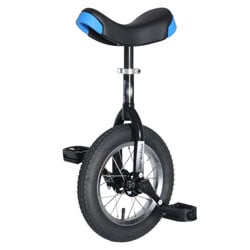
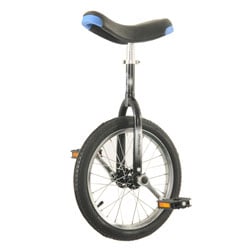
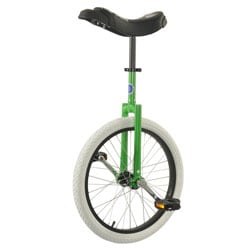
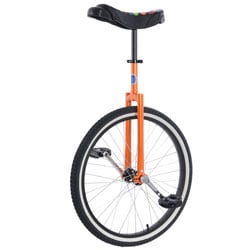
It is important when that the unicycle you select is the right one for that person. This is often not an easy call and sometimes it takes several tries to get the right unicycle for a person.
- 12" - For children under 6 years old
- 16" - As soon as they can fit on them, but generally from 6 to 10 years old children.
- 20" - As soon as a person can fit on them and this is normally from 8 years old and upwards.
- 24" - People over 6 foot, road cyclists or mountain bikers
- Trials/Muni - these make great learning machines with lower tyre pressure helps absorb bumps etc. They are also good outdoors.
 |
 |
 |
 |
Find a good space to learn in this really helps. You want a flat, smooth ground with a wall or railing next to it. Here are some examples:
- A gym or indoor area with a smooth wooden floor and a hand rail about elbow height.
- A tennis court or outdoor concrete path that is swept free of small stones and has no bumps or cracks. A firm rail or fence is helpful.
- A narrow corridor allows you to hang on to both walls. Work your way along and back, trying to hold on less and less each time.
- You can start between two chairs placed back to back in front of a wide open space. Get your balance then launch into space Get two friends to hold you up, or get between a friend and a wall. The friends should be half a pace in front of you and carry none of your weight. Its cheating if you have your arms around their shoulders!
- Do not try to learn on grass or rough ground, this is just making things harder for you.
Few Quick Adjustments. Make sure you have the unicycle set up the right way around. The wide part of the saddle goes at the back and the frame, pedal and crank are all marked with "L" & "R" - make sure these are on the right side.
When you're seated on the unicycle, with the heel of one foot on a pedal in its lowest position, your leg should be almost straight. Getting the right height is important. If not your riding posture will make learning much more difficult. If the seat does not go high enough you'll need a bigger unicycle or a longer seat post.
A quick rule of thumb is to stick your thumb in your belly button. The top of the saddle should be 2-3 centimetres below.
Safety - Unicycling is generally not dangerous, but expect to fall every now and again, especially while learning. Do not wear any loose clothing and tuck in your laces. The vast majority of unicycle falls result in the rider landing standing uninjured on their feet. If you are worried we recommend wearing a helmet and wrist guards, sneakers and trousers.
Mounting in Eight Steps:
- Stand with both feet flat on the ground, legs apart.
- Put the seat between your legs.
- Walk forward so that one pedal is in the 4:00 position.
- Step onto this pedal.
- This is different from a bicycle. If you stand on the front pedal, the unicycle will roll away as you attempt to get on it. Hold on to the handrail or fence.
- Step onto the lowest pedal.
- As you step up the wheel will rotate 1/4-turn backwards. You should now be on the seat with the wheel underneath you.
- Pedal backwards 1/4 turn to get your feet horizontal.
- This gets you out of the "dead spot" when your cranks are vertical.
Getting Your Balance - Now that you have Mounted, rock there for a moment and feel for balance. You can keep your body still and let the unicycle move under you 1/4 turn each way. Some tips:
- Sit up straight.
- Not too stiff with your chest puffed up.
- Not too floppy with your bum stuck out the back: Watch for Elvis Pelvis.
- Straight but relaxed is good.
- Keep your weight on the seat.
- If you stand up or put too much weight on the pedals the unicycle will wobble as you ride.
Taking Your First Steps - Now you you can Balance you are ready to go forwards, along the rail.
- Reach forward and grab hold further along the rail. Lean forward slightly while pedalling slowly.
- Pause when your feet are horizontal again to check your posture and that you are sitting on the seat and not trying to stand up on the pedals.
- Take it one "step" at a time from horizontal feet with your left foot forward to horizontal feet with your right foot forward. Its just like learning to walk.
- Make sure you are sitting up straight.
- Build up from one step at a time to two steps, then three steps.
- Try to hold the rail less and less until it is only needed for occasional balance correction.
Now you have taken your first steps, gradually lean less and less on the support. Try just running your hand along the rail for extra balance.
- Remember: relax, keep your weight on the seat.
- Riding speed is a fast walk, so practice going along the rail at this speed.
- To steer, point your knees / swivel your hips the way you want to go.
- Steer gradually away from the wall for one or two revolutions, then come back to regain balance.
- Try to let go of support for one or two turns of the wheel.
- When you reach the end of the rail, just keep doing the things you have been doing beside the rail and ride on out.
Idling or rocking is a useful basic skill. Here are some tops for learning to idle:
- Saddle at the right height (leg almost straight at the bottom of the stroke)
- Lots of weight on the bottom pedal - it does most of the work.
- Remember it is a pendulum action, NOT riding back and forwards. Note the idling in this video.
- Since your shoulders do not move forwards and backwards, you can use them to give balance guidance while learning.
